
Add a tank in Inventory Management
Create a terminal tank from Inventory Management with Add Tank. The drawer title is Add Tank; submit with Create Tank.
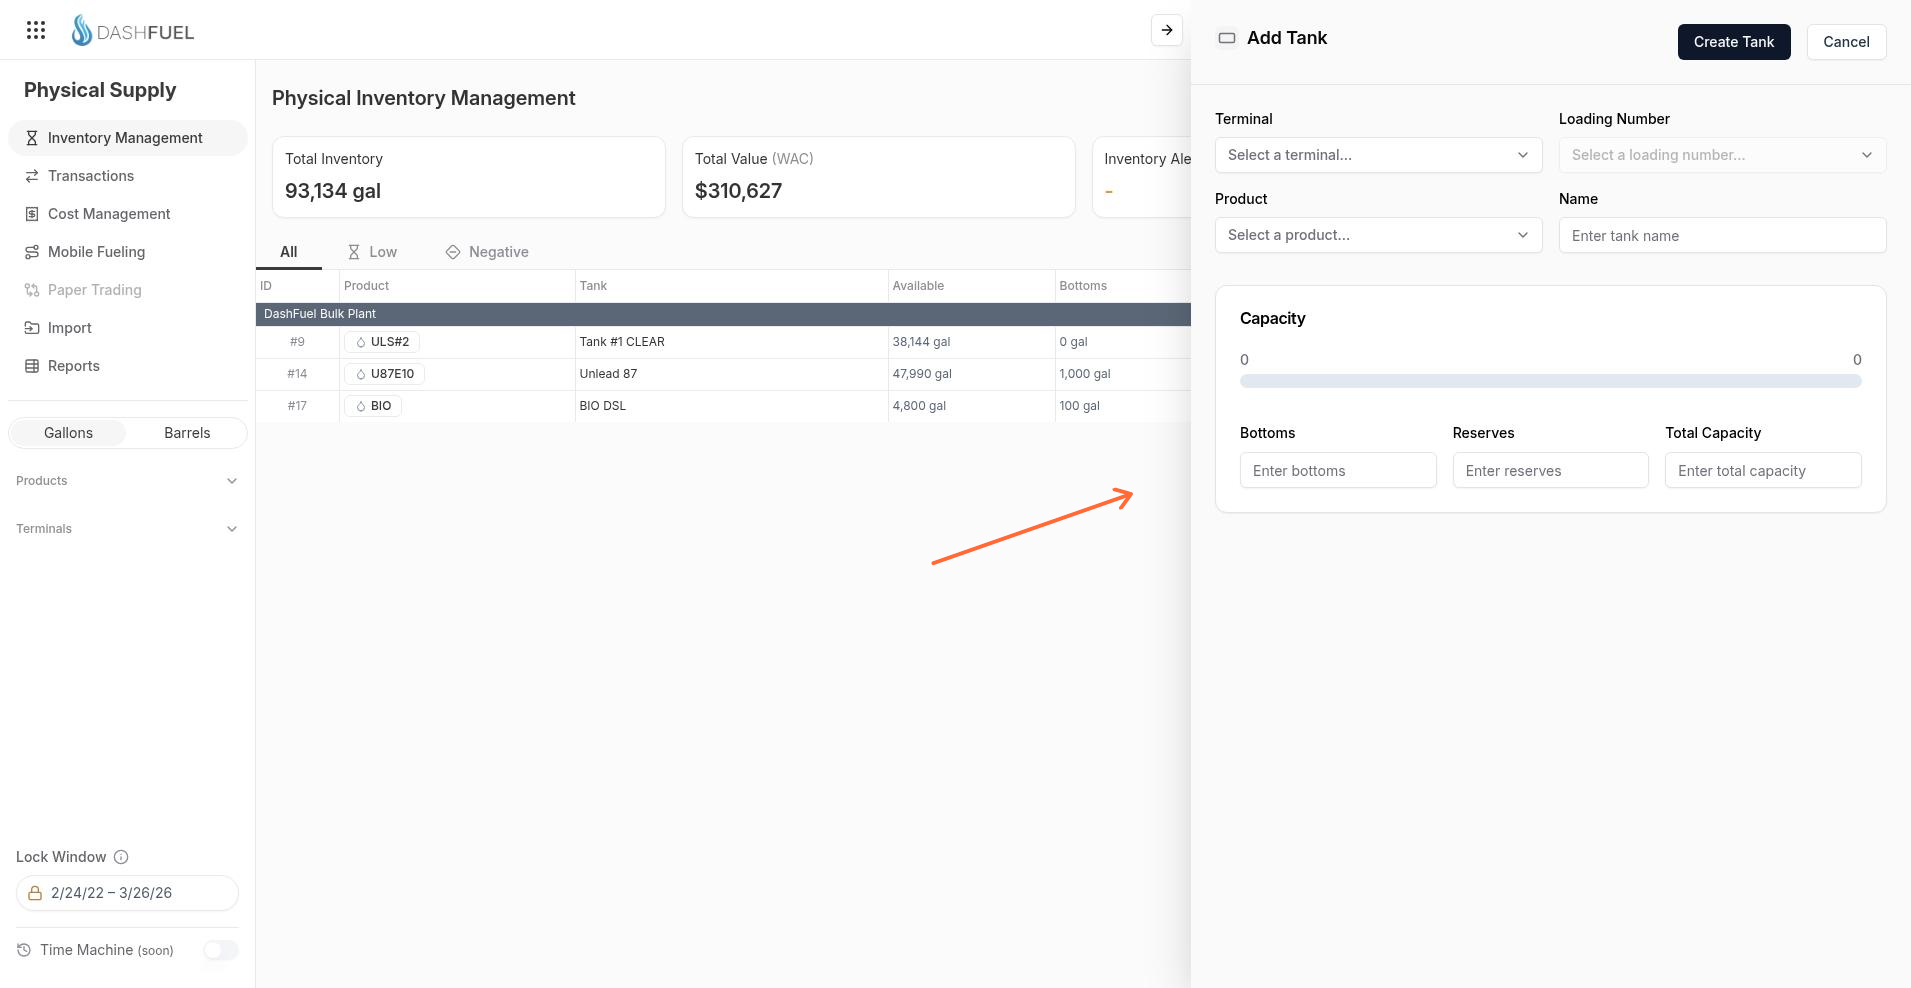
Open the Add Tank drawer
Start from the Inventory Management header.
In the Physical Supply sidebar, open Inventory Management.
Select Add Tank.
The Add Tank drawer opens on the right. Use Cancel to close without saving.
Complete the tank form
Fill the create fields, then create the tank.
Choose a Terminal (placeholder: Select a terminal...).
Optionally choose a Loading Number (placeholder: Select a loading number...).
Choose a Product (placeholder: Select a product...).
Enter a Name (placeholder: Enter tank name).
If the terminal is virtual, choose a Supplier.
Under Capacity, enter Bottoms (placeholder: Enter bottoms), Reserves (placeholder: Enter reserves), and Total Capacity (placeholder: Enter total capacity).
Select Create Tank.
On success, DashFuel shows Tank created successfully. On failure, it shows There was an error creating the tank.
Create rules
The create form enforces these checks before a tank can be saved.
Name, Terminal, and Product are required.
Total Capacity is required and must be greater than 0.
Bottoms and Reserves are required and cannot be negative.
Bottoms cannot be greater than total capacity.
Reserves cannot be greater than total capacity.
Bottoms and Reserves combined cannot be greater than total capacity.
Bottoms is the tank’s minimum inventory threshold. Reserves is the additional low-level threshold above bottoms.
What's next
After tanks exist, open them from the table to review a terminal or tank in Inventory Management. For how the list and columns work, see Inventory Management overview.