
Create a load on the web
Open Create Load from the web app, fill Destination, Products & Sourcing, and notes, then save with Save, Save & Add Another, or Duplicate Options.
For every field and save check, see Create load form fields. Drivers and other mobile users create loads in the app with a different flow — use Create a load in the mobile app.
Open Create Load
Click Create Load from any of these places; each opens the same form.
Dispatch Center list or calendar sidebars
Command menu
Customer list actions or a customer location’s loads
Inventory site views (load history, upcoming loads, or usage)
Invoicing
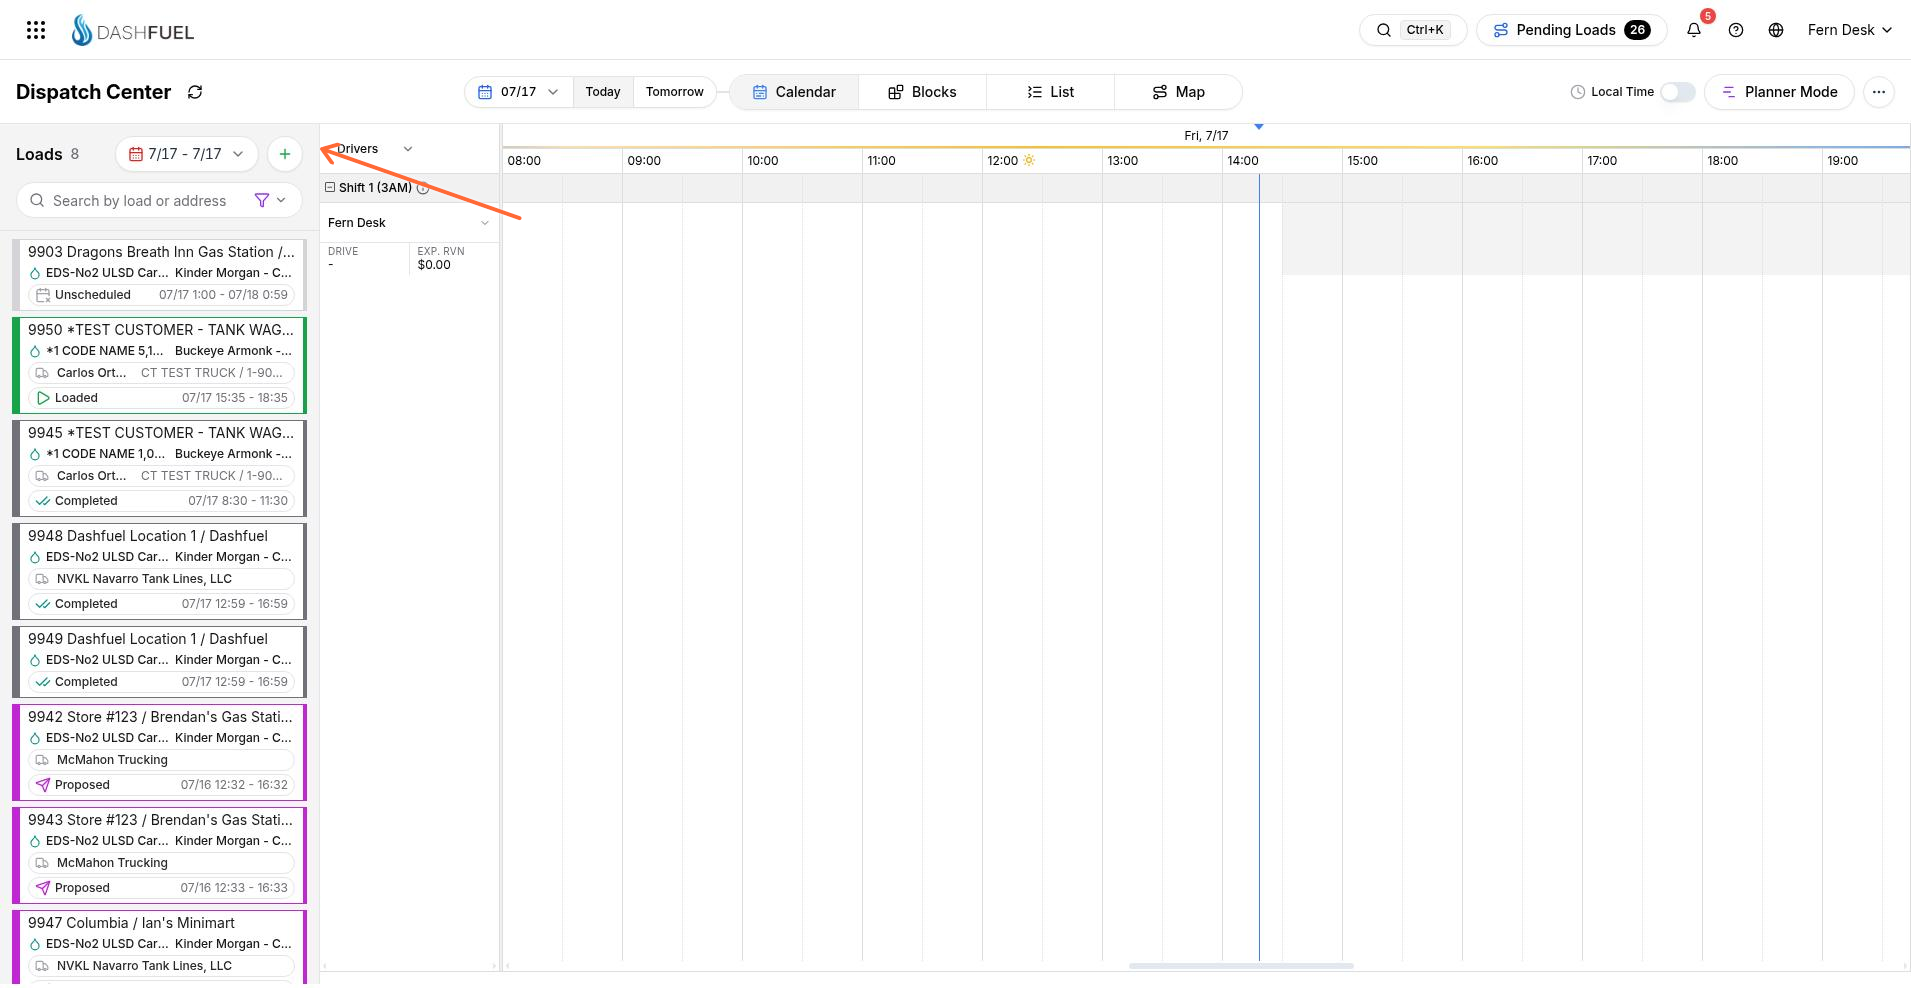
Starting from a customer context can pre-fill customer details. Complete any remaining fields before you save.
Fill Destination
In the Destination sidebar, set who and where the delivery is for, the delivery window, and optional assignment.
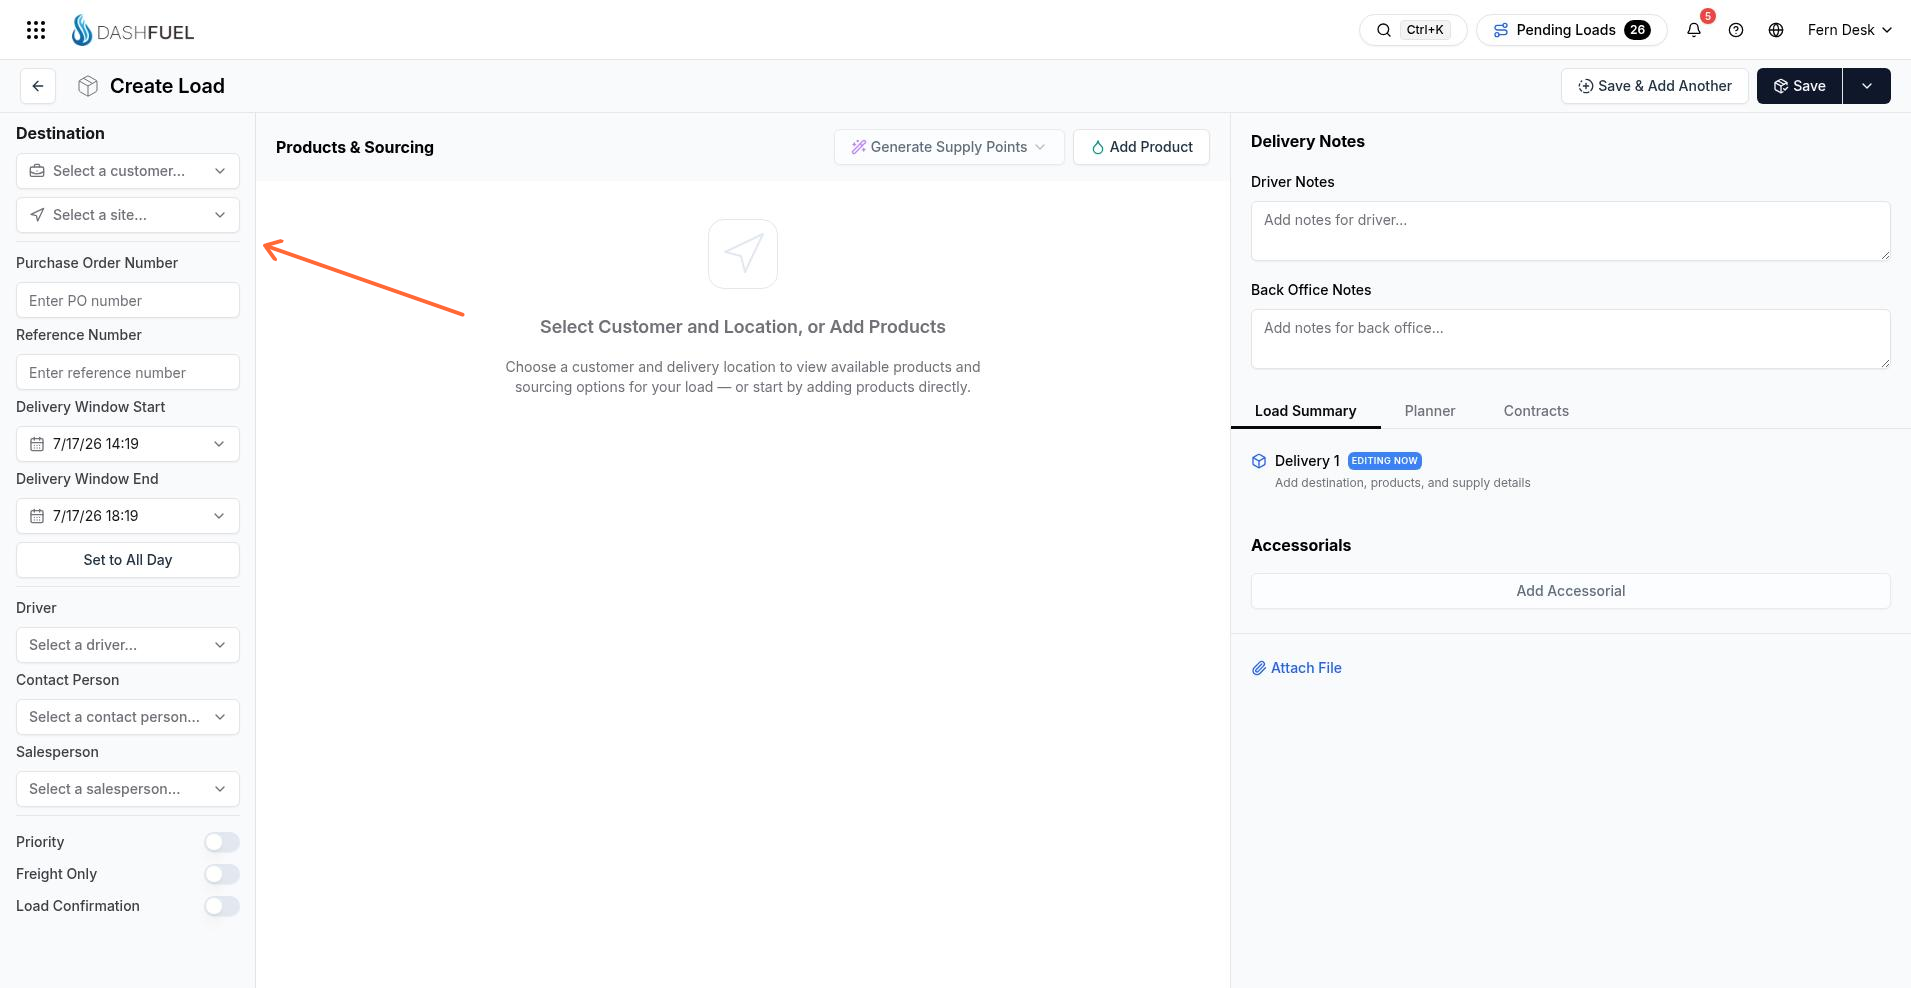
Choose Customer and Site.
Enter Purchase Order Number and Reference Number when you need them. A PO is required when the customer account requires one.
Set Delivery Window Start and Delivery Window End (shown with the site timezone when available). Use Set to All Day to set the window from the start of that day to the end of that day. Changing the start time sets the end time four hours later.
Optionally assign Driver, Contact Person, and Salesperson, and set Priority, Freight Only, and Load Confirmation. Freight Only and Load Confirmation are hidden for common carriers.
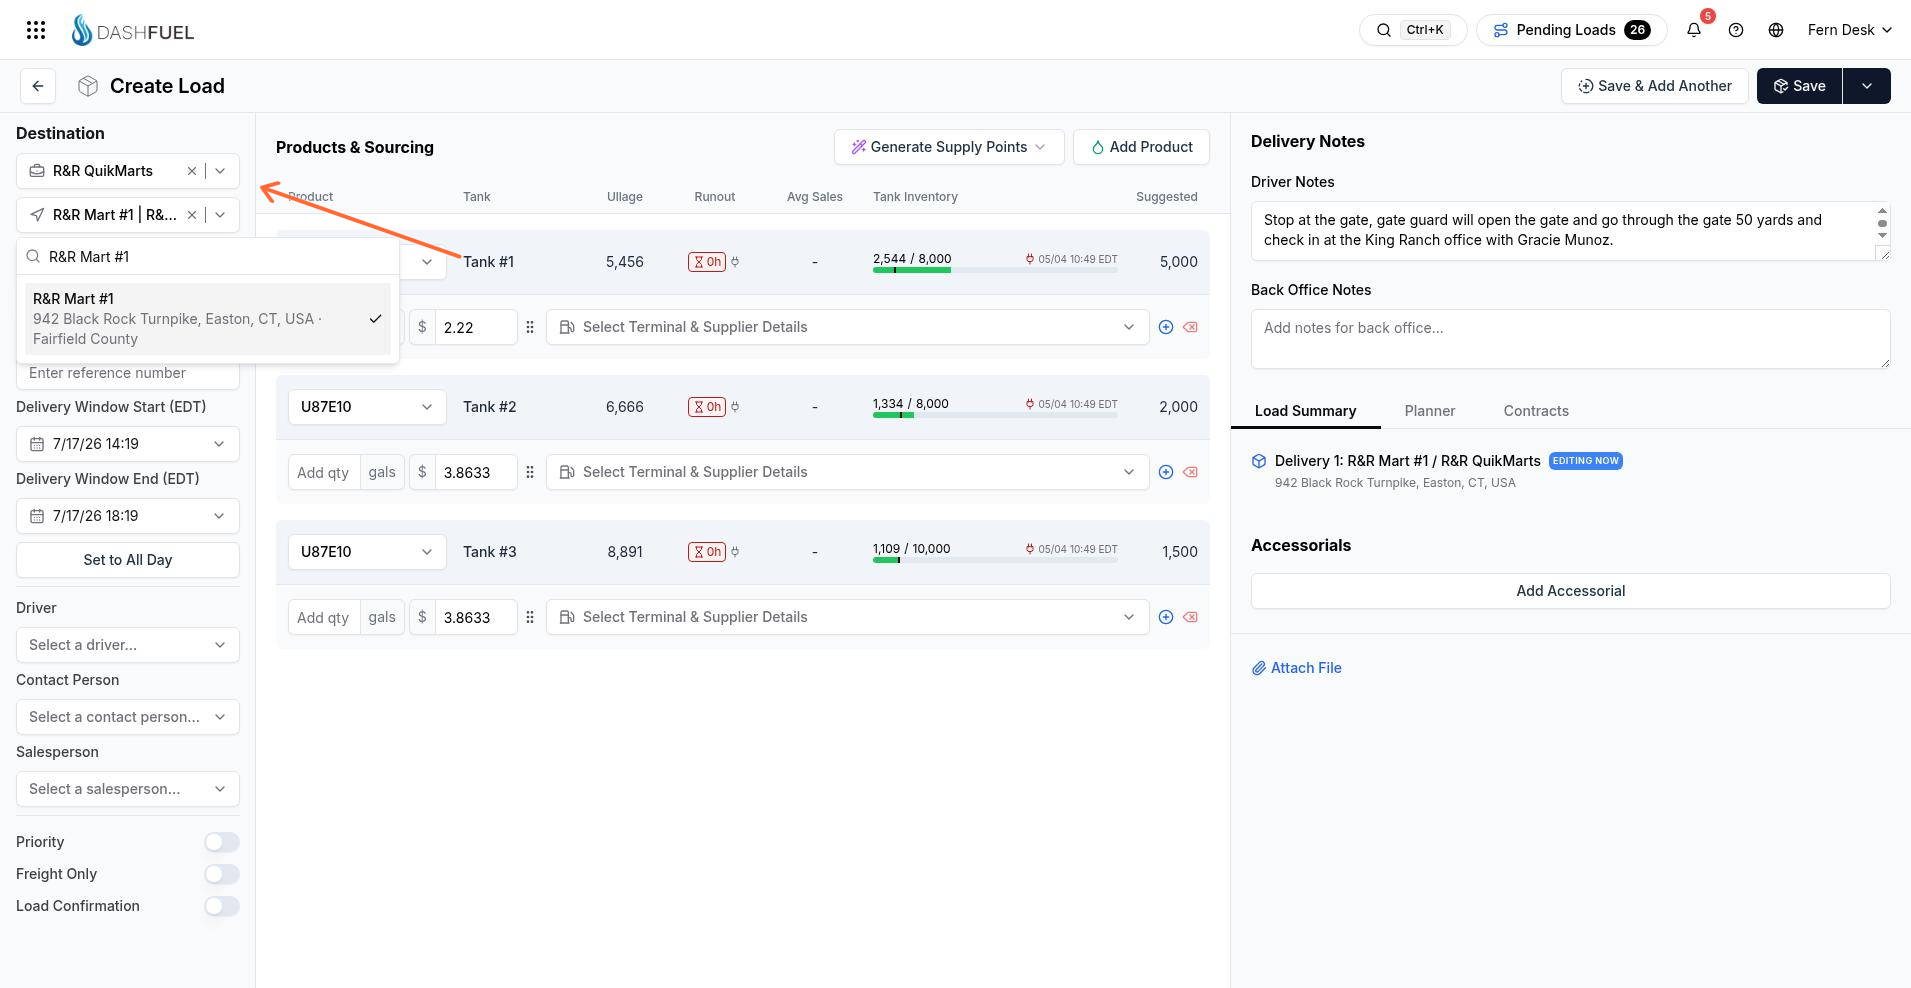
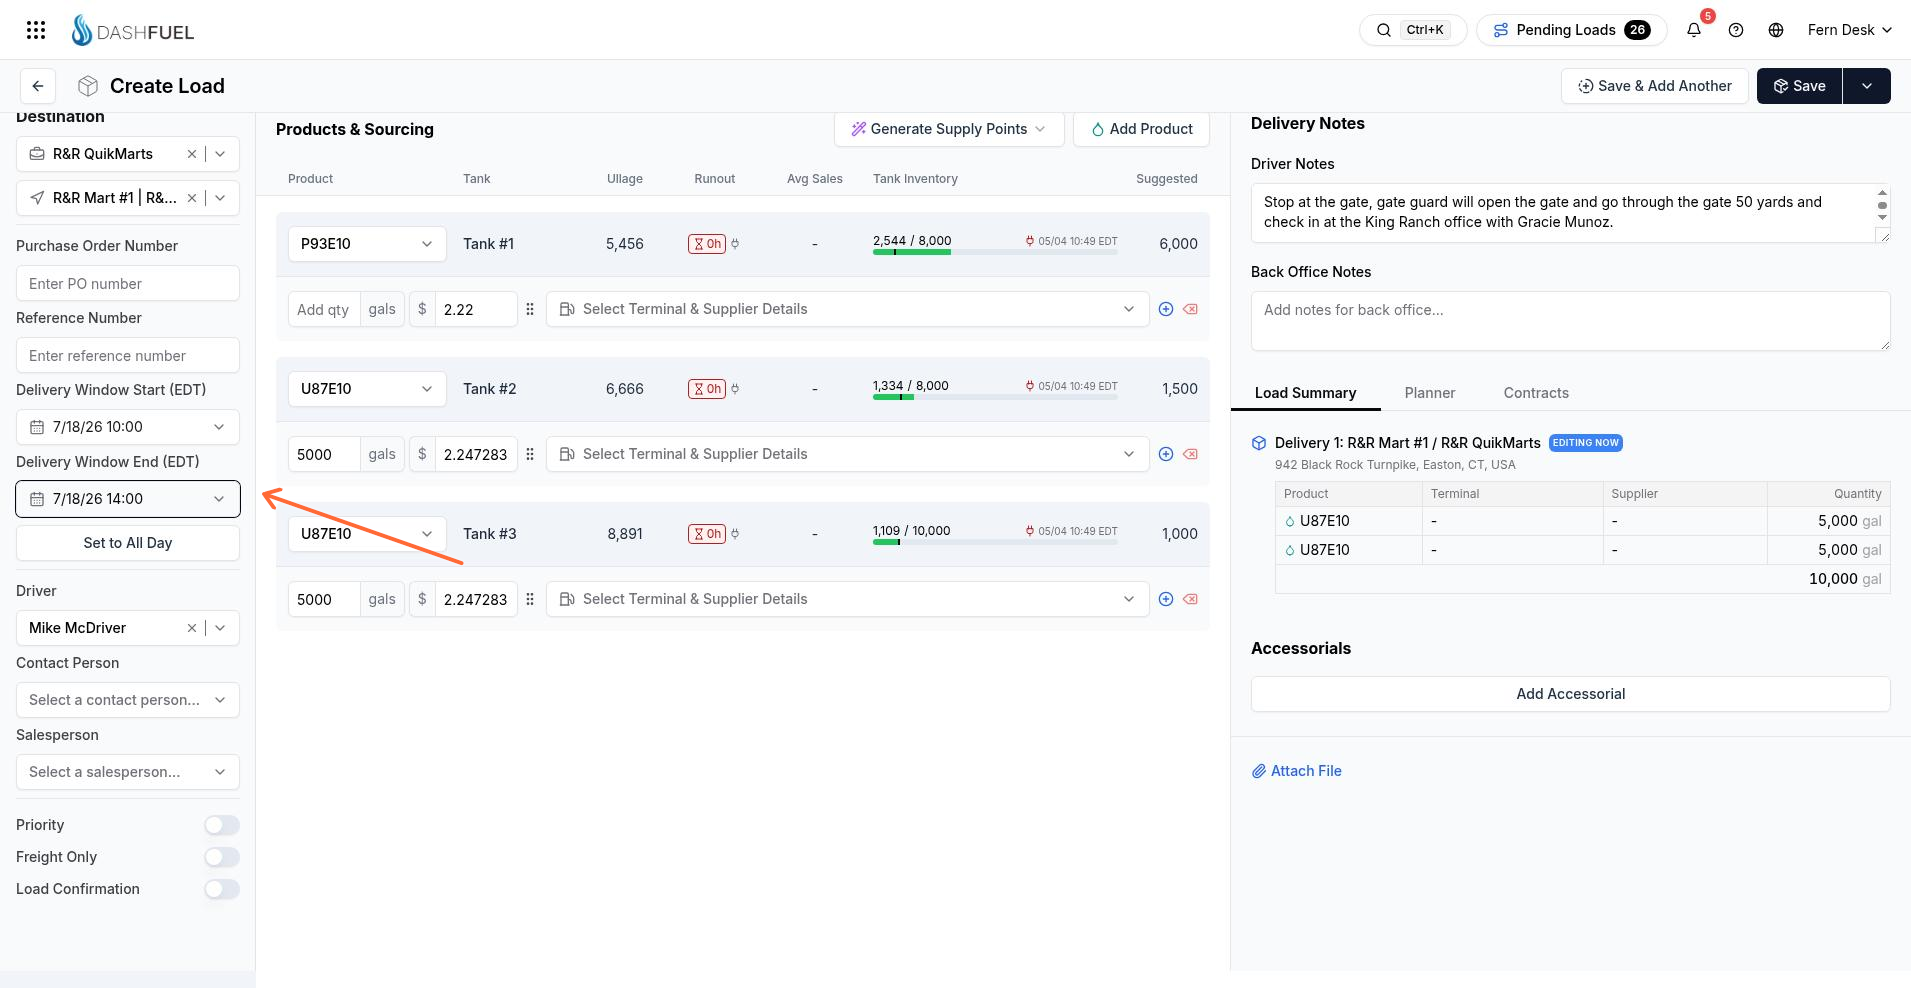
If the selected customer is over their credit limit, the form can show Credit limit exceeded.
Add products
In Products & Sourcing, add each product line for the load.
Click Add Product if products are not already listed for the site.
Choose the product, quantity, and sourcing.
Repeat for every product on the load.
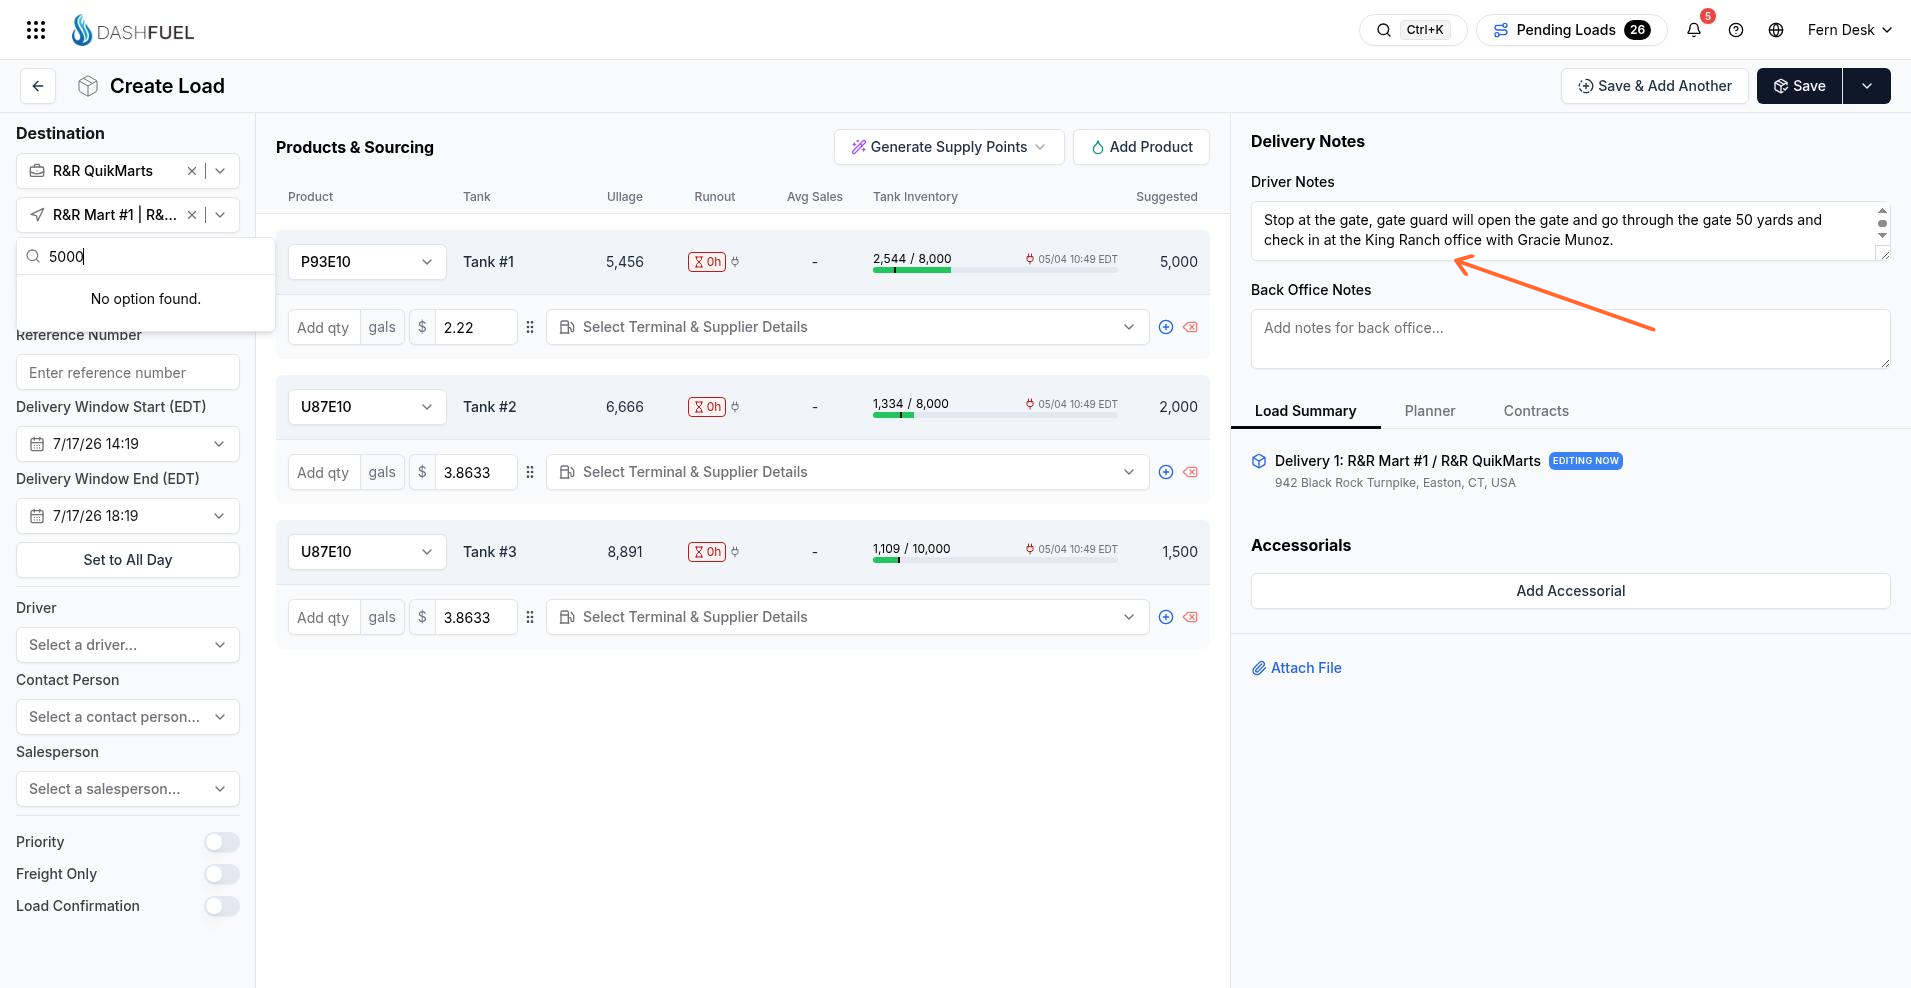
Choosing customer and site first lets the form work with that location’s tanks and products. If no products are selected, the panel shows an empty state until you add them.
Add notes
Use the notes area for driver-facing and internal notes. On smaller screens, open it with Notes & Summary.
Delivery Notes — section for driver-facing notes; the field label is Driver Notes.
Back Office Notes — hidden for customers and common carriers.
When you have price permission and you are not a customer, tabs can include Load Summary, Planner, Contracts, and Load History. Load Summary, Contracts, and Load History are hidden for common carriers. Load History is also hidden when the load already exists.
Save the load
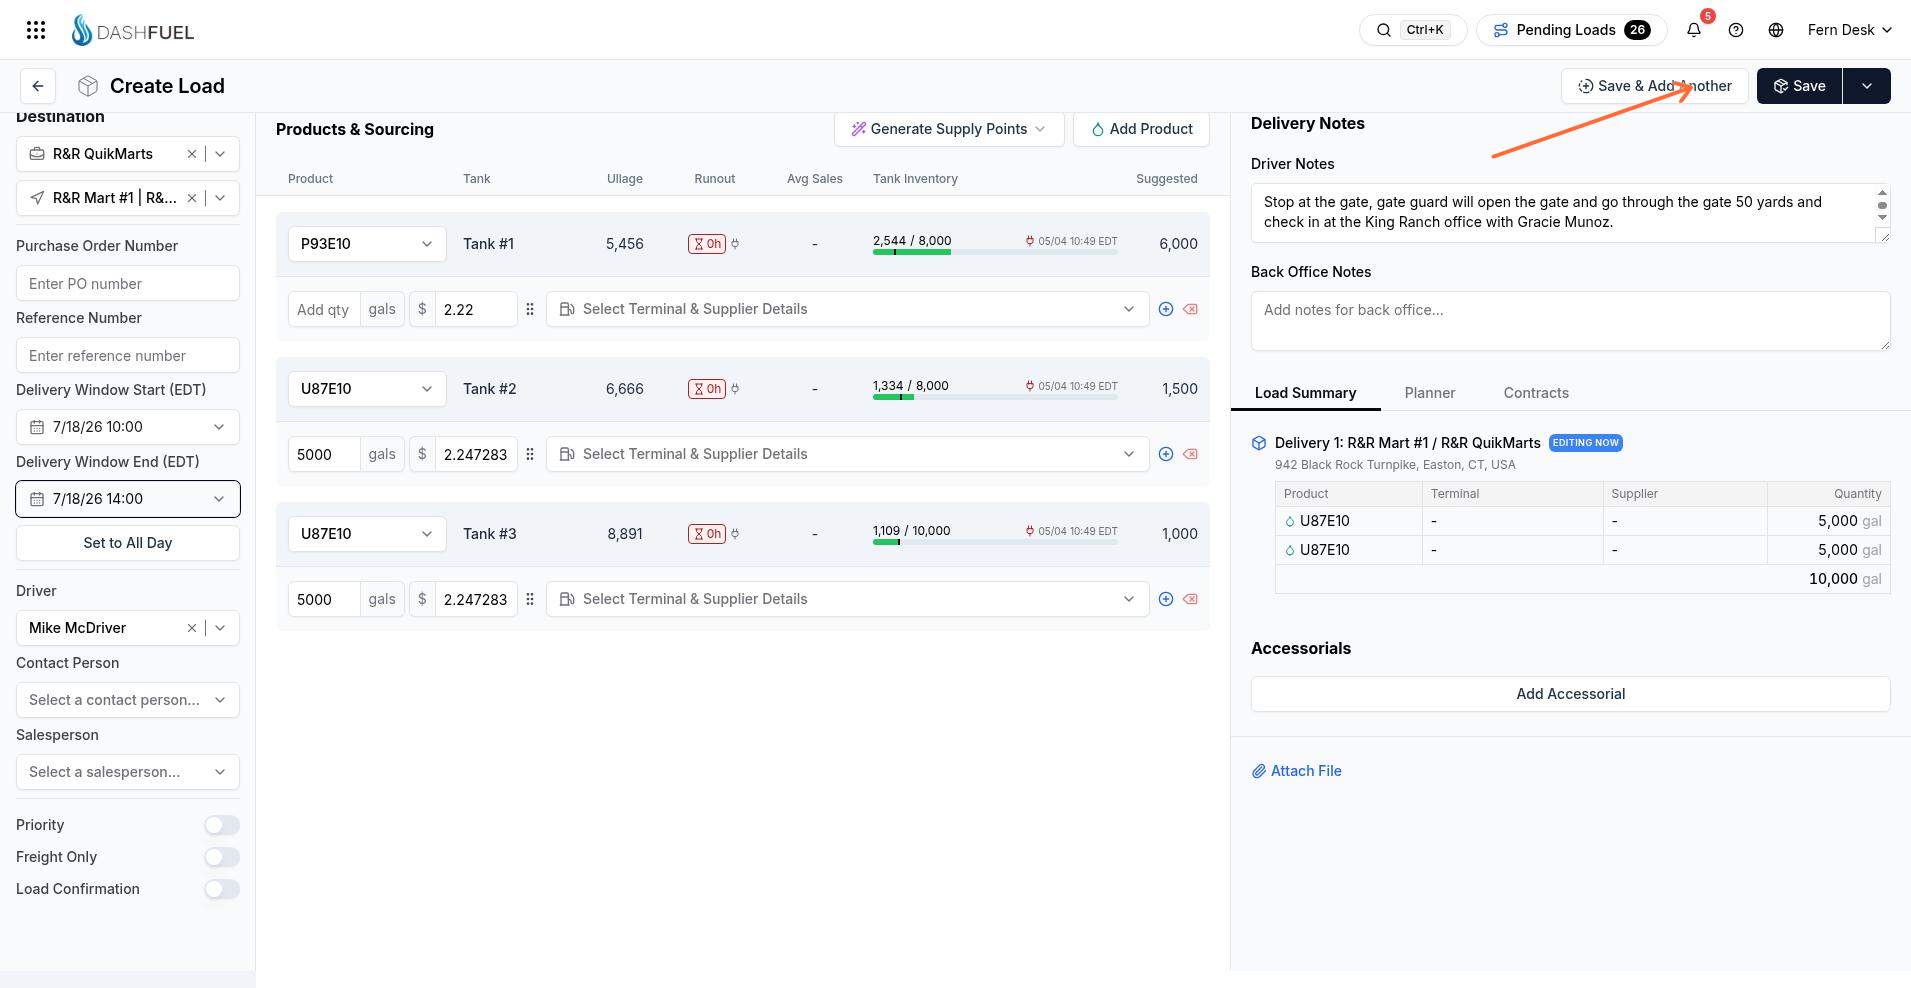
Use one of the header actions when the form is ready.
Save — creates the load, shows a toast Load LD-[id] created (with a View action for non-customers), and leaves the create page.
Save & Add Another — creates the load, then opens Create Delivery for that load so you can add another stop.
Duplicate Options — only when you are creating a new load, not when you are only adding a delivery. Set how many orders to create and submit from the menu.
In Duplicate Options you can set Orders per day, Duplicate across following days (1 = today only, 3 = today + next 2 days), Default PO number, and Auto-increment PO number (requires a default PO that ends in a digit). Submit creates the batch; a full success toast shows how many loads were created.
For field definitions and every save check, see Create load form fields. Status meanings are in Loads Overview.
Create Delivery mode
When you add a delivery to an existing load, the form title is Load #[load number] | Create Delivery.
Save creates the delivery, shows Delivery for load LD-[id] created, and returns to the load or the page you came from. Non-customers get a View Load toast action.
Save & Add Another creates the delivery and keeps you on create-delivery so you can add another stop.
Duplicate Options is not shown in this mode.
You reach this mode after Save & Add Another on a new load, or when you open create delivery from an existing load.
When create fails or warns
If create cannot finish, a failure toast uses one of these titles:
Failed to create load — a single new load did not save.
Failed to create loads — a bulk create did not save.
Failed to create delivery — adding a delivery did not save.
Before save, the form blocks when the end time is not after the start time, or when a required PO is missing. It can open Scheduling Warning (confirm with Proceed) for delivery times outside the site’s delivery windows and for some driver or equipment issues. Full check details are in Create load form fields.
What’s next
After the load exists, schedule or reassign it from The Dispatch Center, edit the load, or track status in Loads Overview.