
Create a customer tank
Open a customer location’s Tanks & Products tab, choose Add Tank, complete the Create Tank form, and submit with Save Changes.
Customer location tanks are separate from terminal tanks in Inventory Management. To add a terminal tank instead, see Add a tank in Inventory Management.
Open Tanks & Products
Start from the customer location where the tank should live.
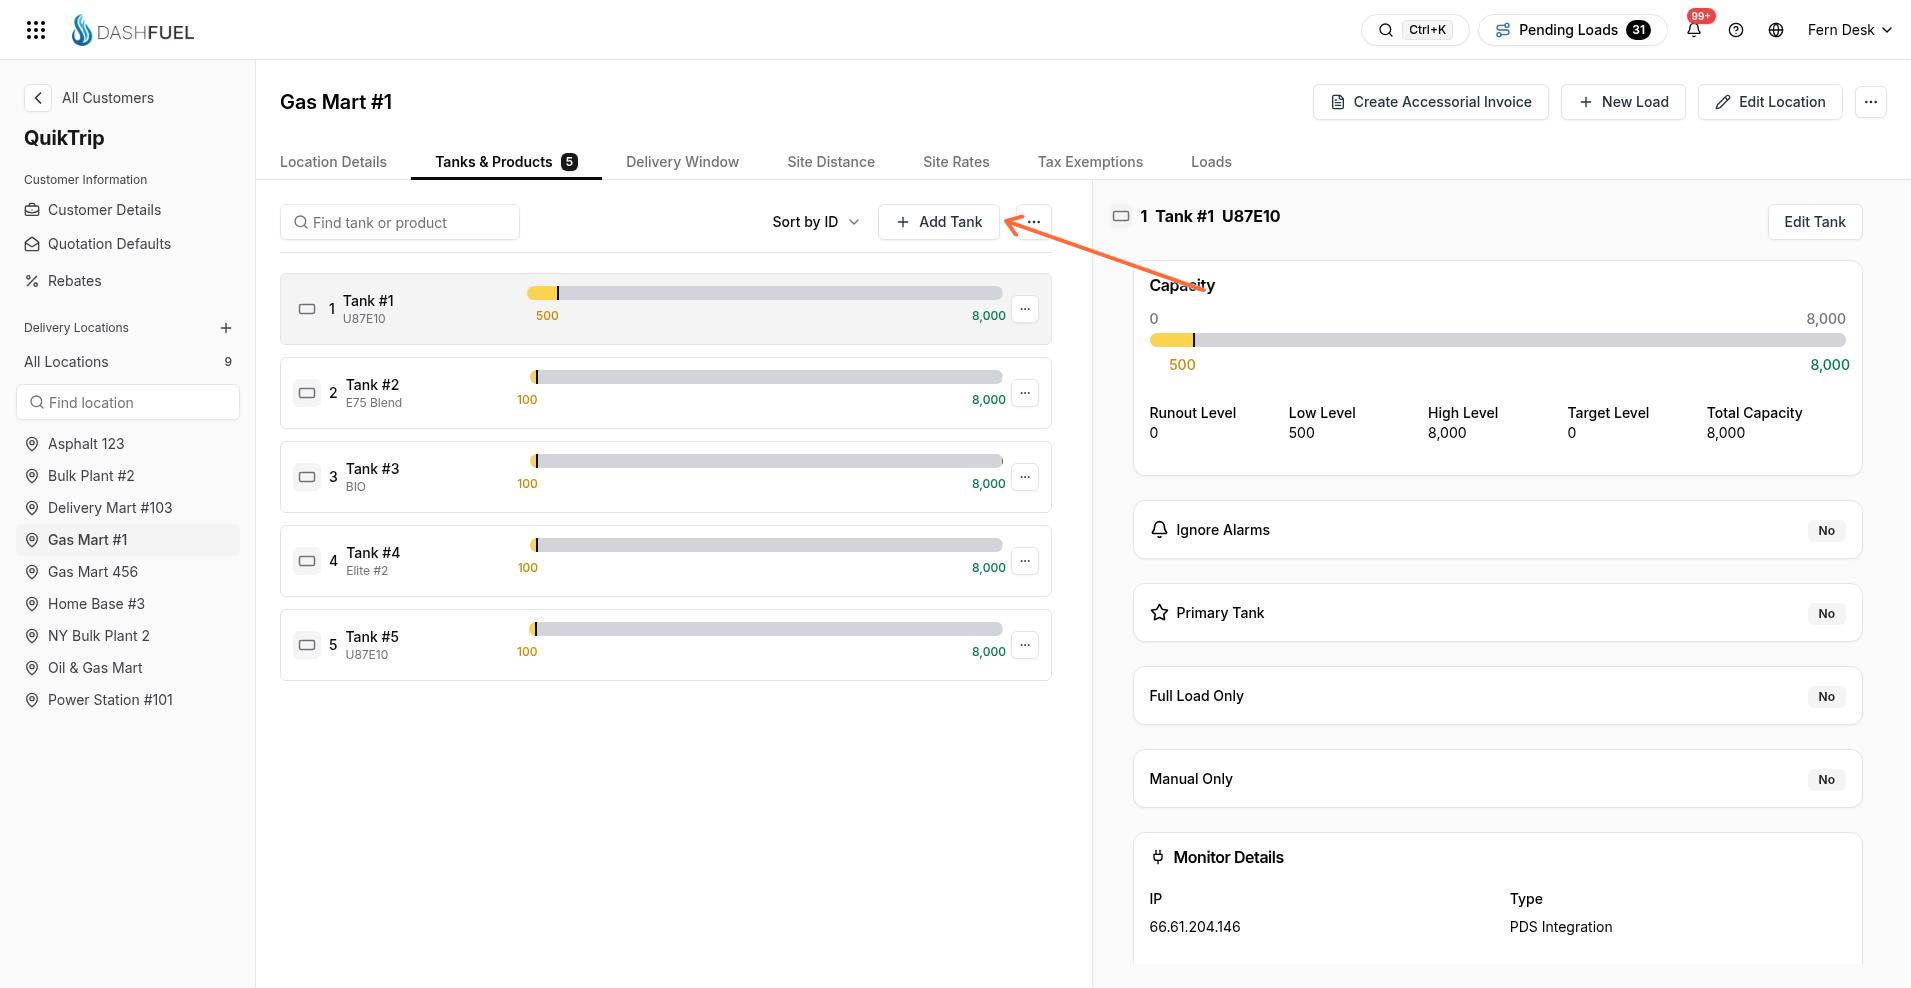
Open the customer, then open the delivery location.
Select the Tanks & Products tab.
Click Add Tank.
You can search and sort existing tanks, and show or hide archived tanks from the same tab.
For the full location tab overview, see Locations.
Complete the Create Tank form
The sheet header is Create Tank. Fill the tank identity and options, then save.
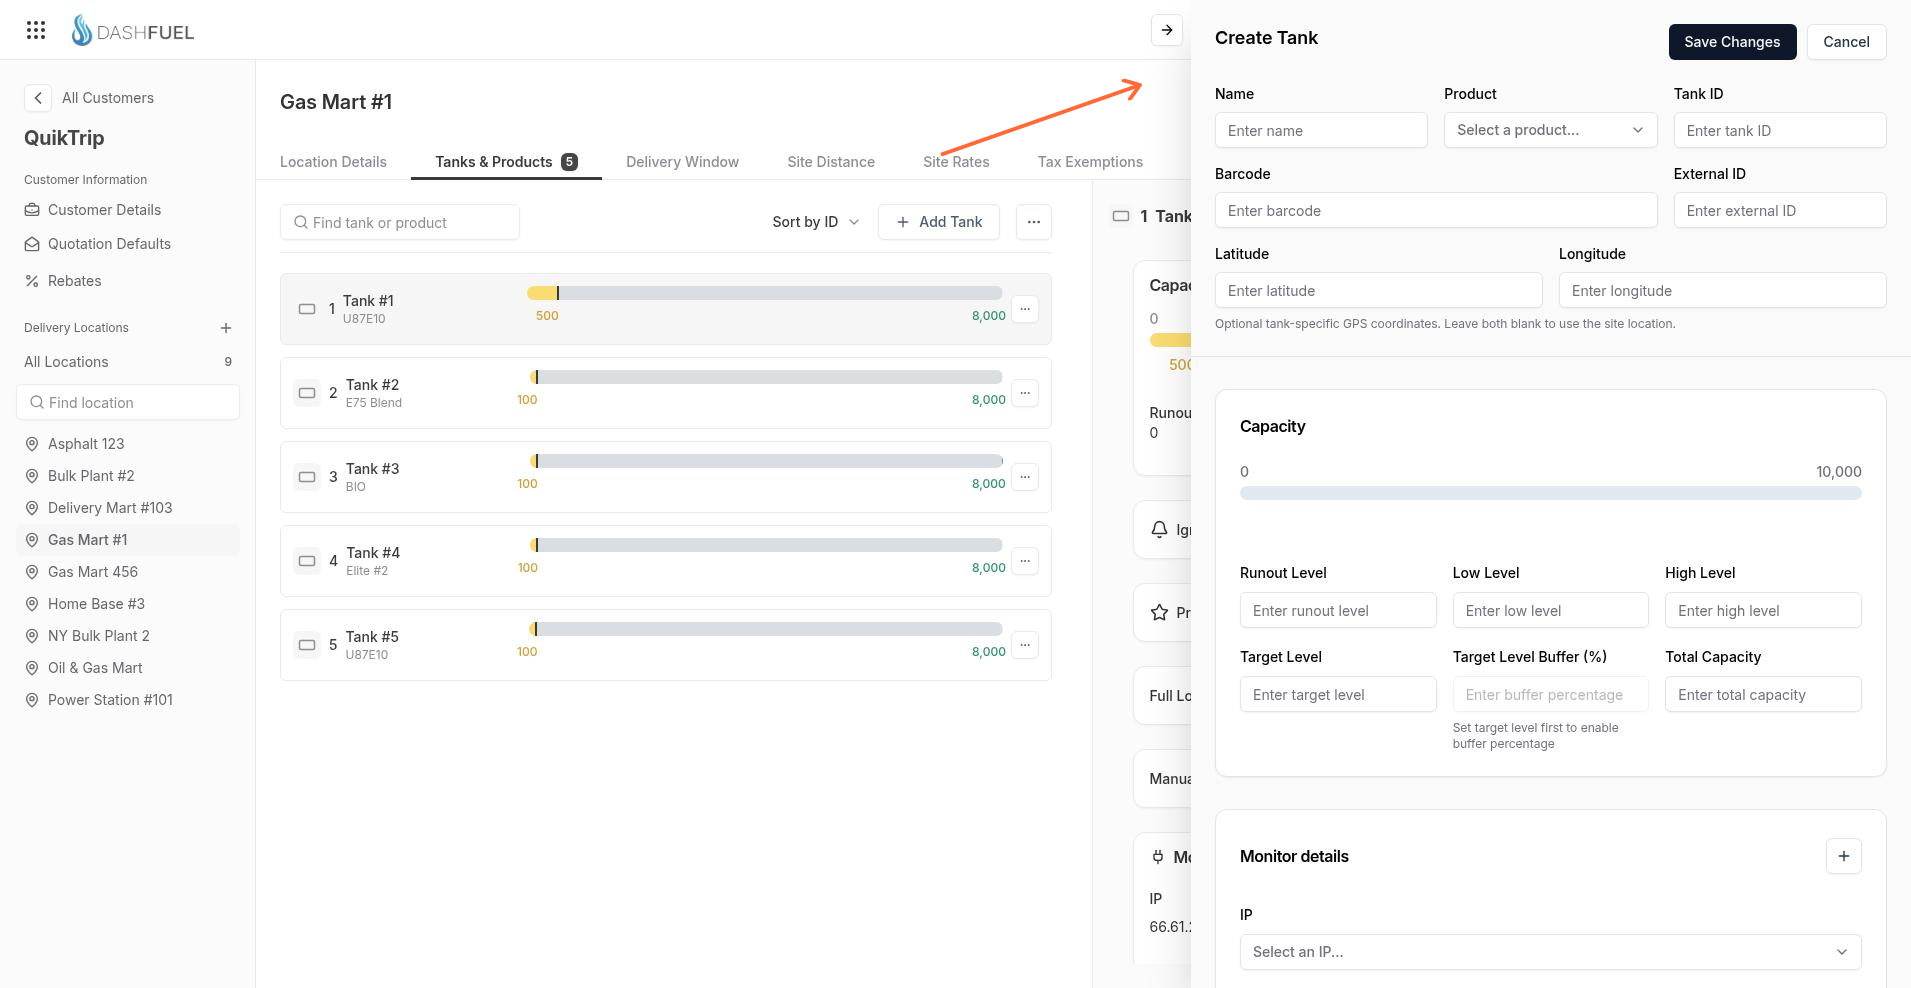
Enter Name and choose Product.
Add Tank ID, Barcode, External ID, and coordinates when you track them.
Set capacity thresholds under the capacity section, or finish them later — see Set tank levels.
Set loading options such as Primary Tank, Full Load Only, or Manual Only when they apply.
Attach a monitor from Monitor details if you use tank monitoring — see Create and assign a tank monitor.
Click Save Changes. Use Cancel to close without saving.
A strapping chart is available only after the tank is saved. Save the tank first, then use View or Generate on the saved tank.
After the tank exists
Saved tanks appear on Tanks & Products. Each row menu includes Open Tank Details, Edit Tank, and Delete Tank. On edit, Ignore Alarms is available for a saved tank. Deleted tanks can be restored.
Set tank levels — refine runout, low, high, target, buffer, and total capacity.
Create and assign a tank monitor — attach monitoring to the tank.